Installing Solution Templates
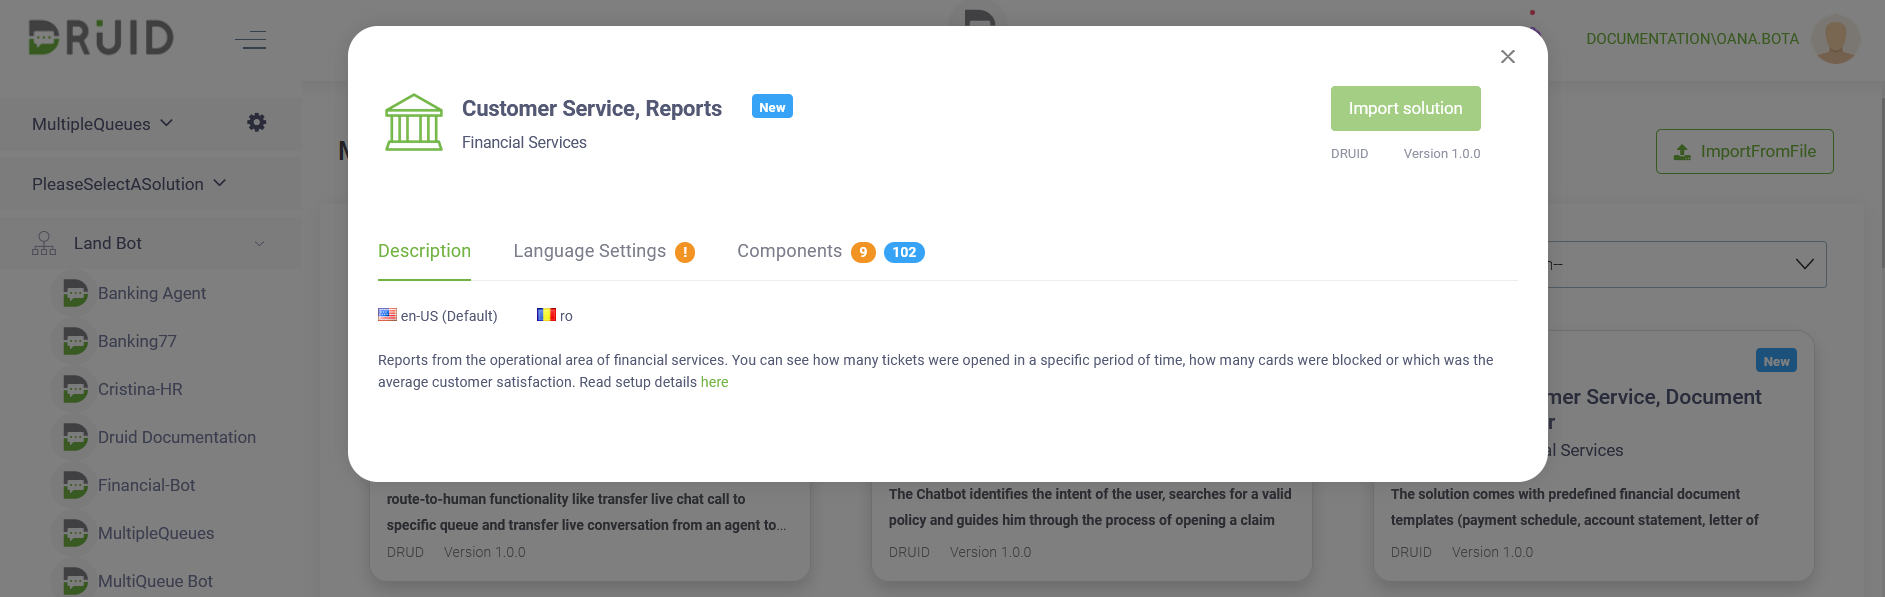
To install a new solution template, spot the desired solution (you can use the filtering criteria) and click on it. Solution details appear. The Description tab provides you with details on the default and additional languages and a brief description of the solution template.
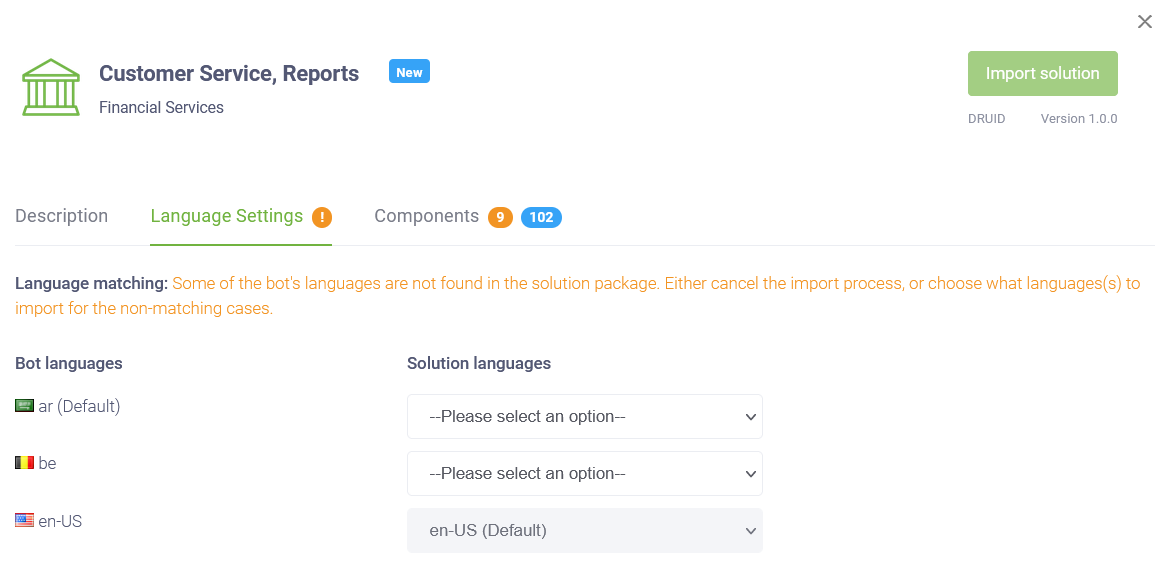
If not all language(s) defined on the destination AI Agent exist in the solution package, a warning icon ( ) displays next to the Language Settings tab. In this case, click the Language Settings tab. The languages from the solution package that exist on the destination AI Agent display as read-only. Select which language from the solution to import for the non-matching language(s) of the destination AI Agent.
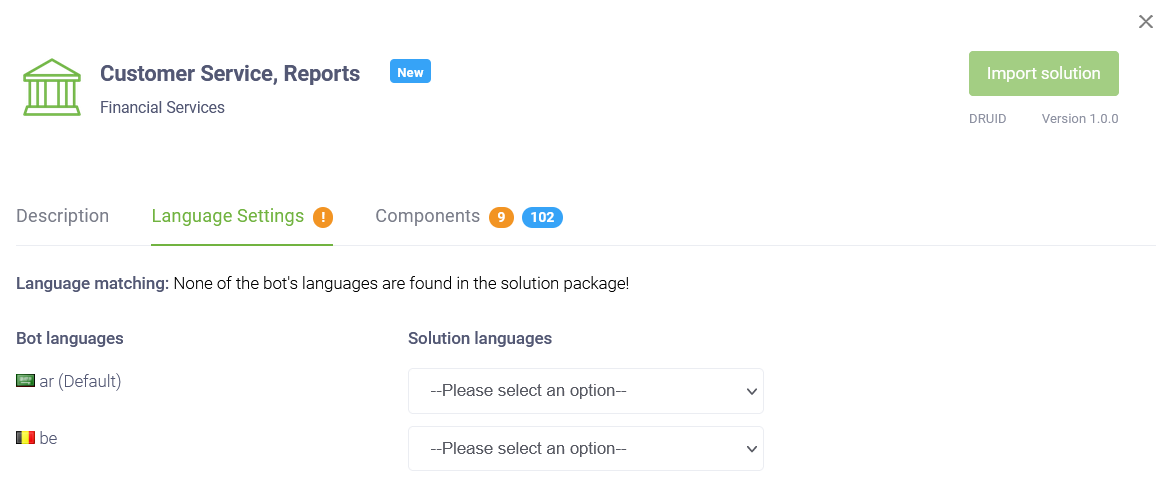
If none of the languages on the destination AI Agent exist in the solution package, you have to select which language from the solution to import on each language of the destination AI Agent.
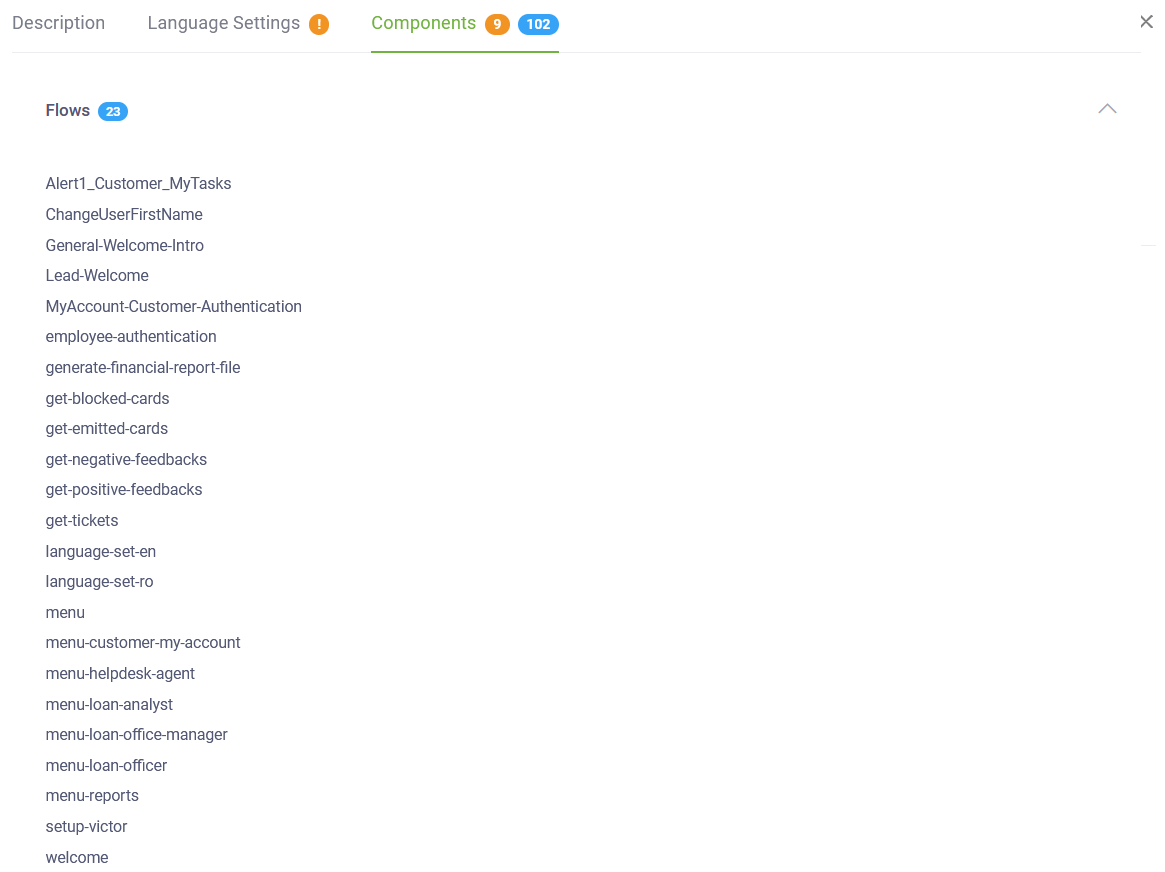
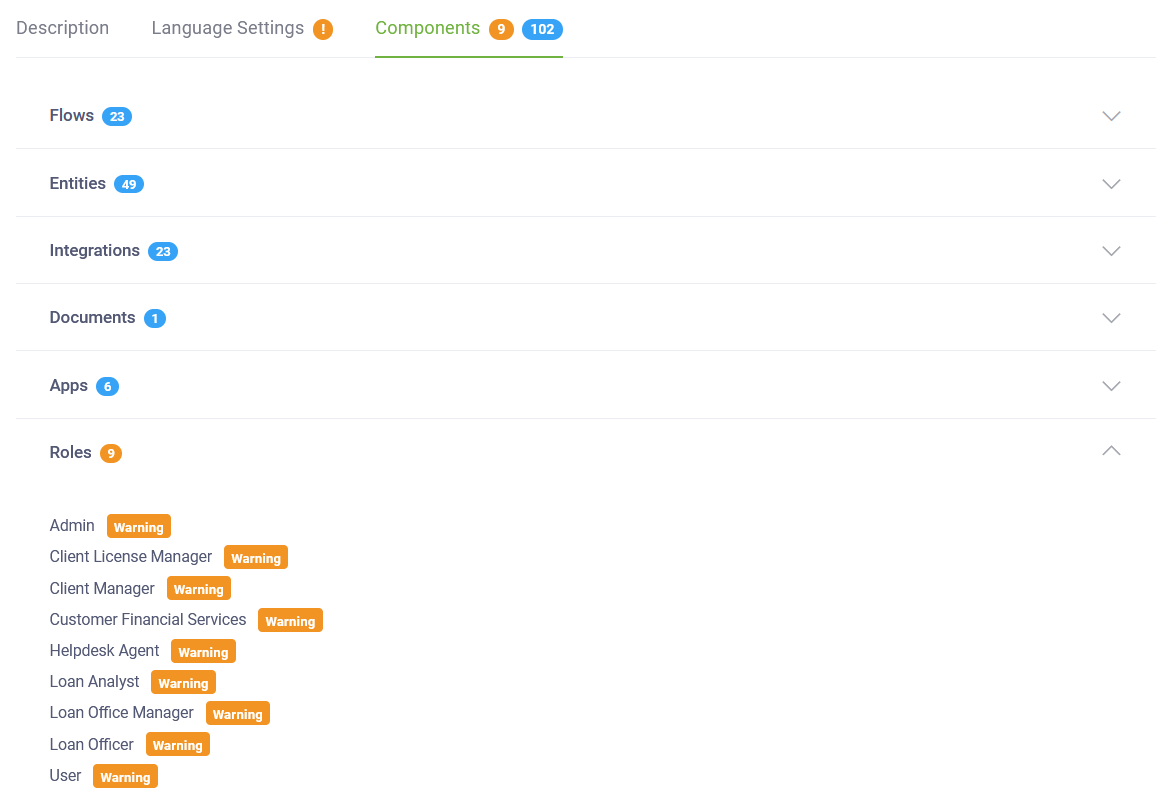
Check the content of the solution template by clicking the Components tab.
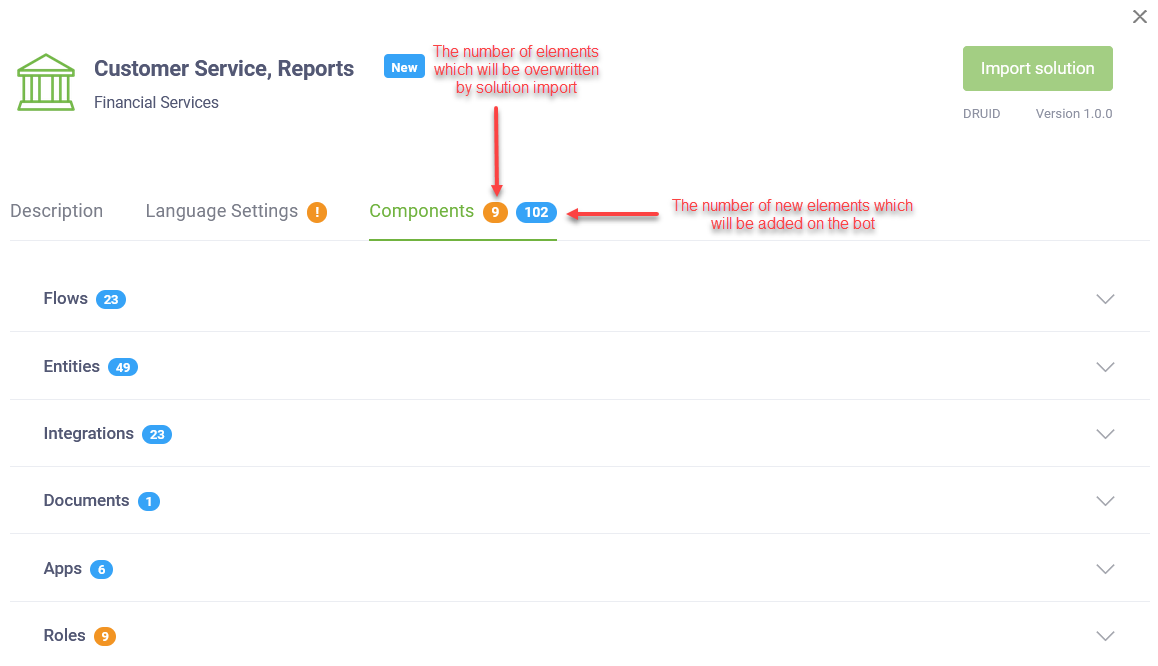
The orange label indicates the number of elements which will be updated by the solution template installation.
The blue label indicates the number of new elements which will be added on the AI Agent.
To see details about a specific element, click on it (e.g., Flows). The list of flows appears including new and existing flow which will be updated on solution import.
To install the selected solution, click the Import solution ( ) button. The selected solution will be imported to the current AI Agent. When the import has successfully completed, a notification is displayed at the bottom-right corner of the page.